Would you like to design the WooCommerce My Account page so it fits your store instead of using the default layout? The Templates Builder in Botiga Pro lets you create a custom My Account template and lay out the account area exactly how you want, using either the Block Editor or Elementor.
In this guide, we’ll walk you through how to build a custom My Account template in Botiga.
Before you get started, make sure you’ve installed and activated the Botiga theme on your WordPress site. If you’re using features from Botiga Pro, ensure that both the Botiga theme and the Botiga Pro plugin are installed and active. The Templates Builder is a Botiga Pro feature, so this requires Botiga Pro.
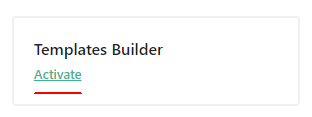
1. Go to Botiga » Theme Dashboard and activate the Templates Builder module.
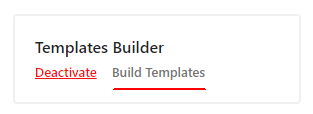
2. Click on Build Templates.
3. Find the My Account category and click on Create.

4. Name your template.

5. Choose the builder.

6. Edit the template content.

The Templates Builder works with either the WordPress Block Editor (Gutenberg) or the Elementor page builder.
7. If you’re using the Block Editor, click the plus icon and search for the Botiga Templates Builder components to insert on the page. If you’re using Elementor, skip this step and move on to the next one.

8. If you’re using Elementor, you’ll find the Botiga widgets under Botiga WooCommerce in the left sidebar. If you’re using the Block Editor, skip this step and follow step 7 instead.

Set display conditions (optional)
By default, the template shows on every page in its category. With display conditions, you can narrow that down so the template appears only in specific situations, for example only for logged-in users.

Click Display Conditions and a popup opens where you can select the conditions you want.

Frequently asked questions
Below, we’ve answered some of the most common questions about building a custom My Account template in Botiga.
Does a custom template change the account features WooCommerce provides?
No. The template controls the layout and styling of the account area. Orders, downloads, addresses, and account details continue to work the way WooCommerce handles them.
Can I show the template only to logged-in users?
Yes. Use display conditions to limit the template to logged-in users, which is a common choice for the My Account page.
That’s it! You’ve successfully built a custom My Account template in Botiga and learned how to control where it appears.
Next, would you like to design the rest of your store flow? Check out our guide on building a custom checkout template, or read the Botiga Templates Builder overview to learn more.
