Would you like to create visually rich, engaging navigation menus for your WordPress site? The Mega Menu feature in Sydney Pro allows you to build custom menu content using Elementor, giving you complete control over the design and layout of your navigation dropdowns.
This guide will show you how to activate and configure the Mega Menu module in Sydney Pro.
Activating the Mega Menu Module
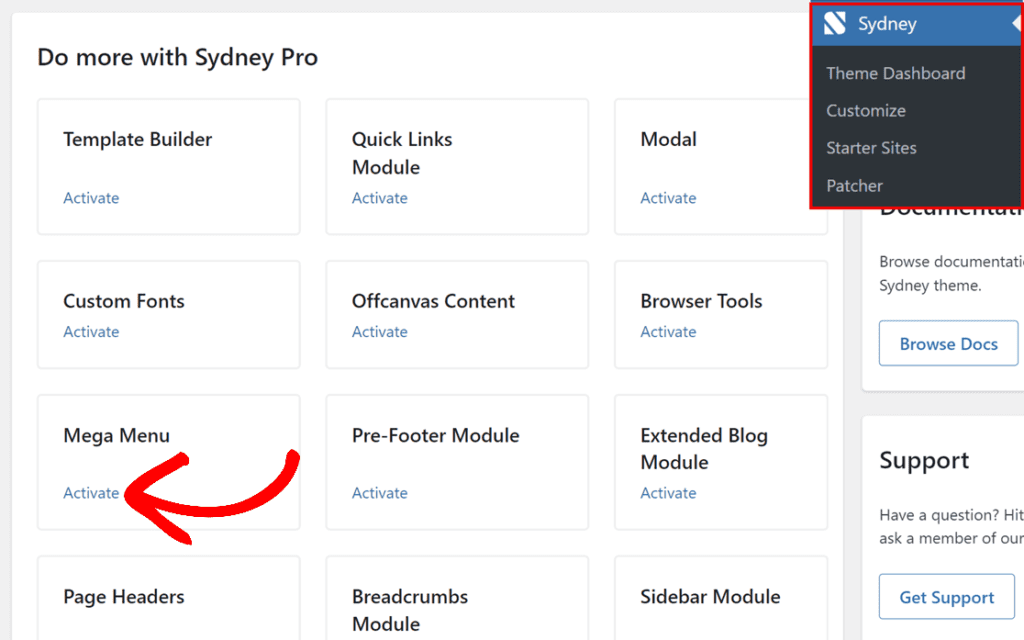
Before you can use the Mega Menu feature, you need to activate the module in the Theme Dashboard.
To activate the Mega Menu module, go to your WordPress admin area and navigate to Sydney > Theme Dashboard.
Once you’re on the Theme Dashboard page, locate the Mega Menu module under the Do more with Syndey Pro section, and click the Activate button.
Enable Mega Menu for a Menu Item
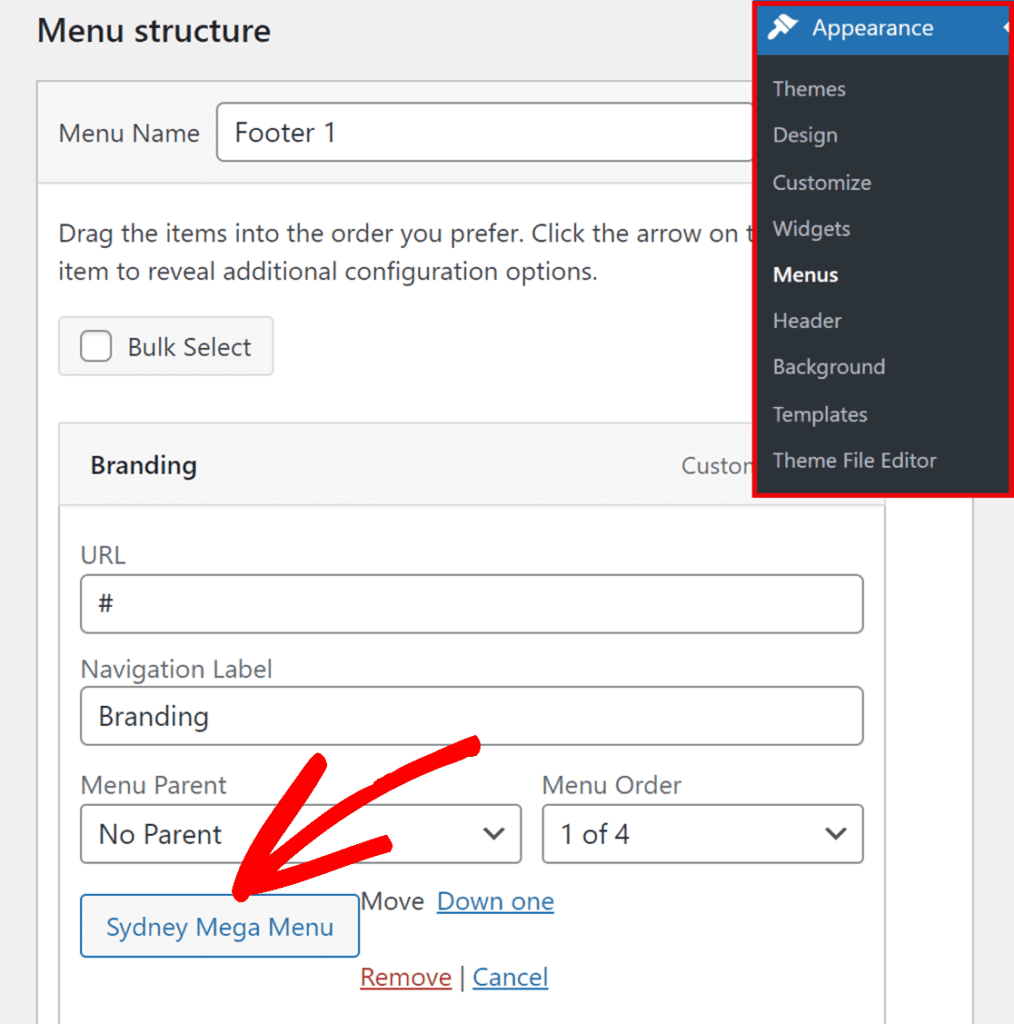
Once you have a menu assigned to the Primary Menu position, you can enable the Mega Menu feature for any top-level menu item.
On the Appearance > Menus page, click on the menu item where you want to add the mega menu feature (for example, an “About” menu item).
When the menu item settings expand, click on the Sydney Mega Menu button.
Then, click on the Mega Menu toggle button to activate it for this menu item.
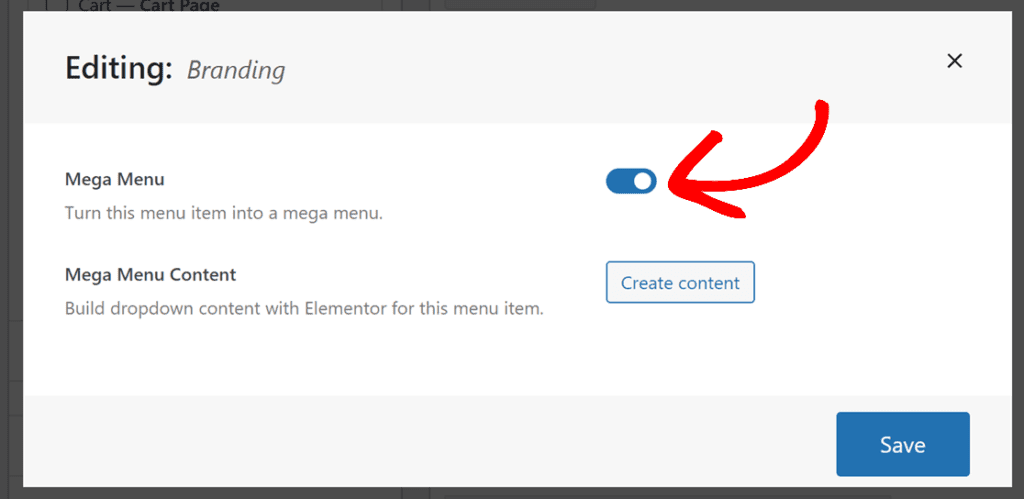
After activating the toggle, a Create Content button will appear. Click this button to start building your mega menu content with Elementor.
Build Your Mega Menu Content with Elementor
When you click the Create Content button, the Elementor editor will open in a popup window.
In the Elementor editor, you can build your mega menu content just like you would build any other page or section. Here are some tips:
- Add Columns: Use Elementor’s column layouts to organize your content. For example, you can create a two-column layout with different content in each column.
- Add Background Colors: Customize the appearance by adding background colors to sections or columns.
- Add Widgets: Insert any Elementor widget you want, such as headings, text, images, videos, buttons, or any third-party widgets you have installed.
- Style Your Content: Use Elementor’s styling options to change colors, fonts, spacing, and more. For example, you can change text colors to white for better contrast against dark backgrounds.
- Add Padding: Add padding around sections to create proper spacing and improve the visual appearance.
- Align Content: Use vertical and horizontal alignment options to position your content exactly where you want it.
Once you’re satisfied with your mega menu design, click the Publish button in the Elementor editor.
After updating, click the Close button (usually an X icon) in the top corner of the Elementor popup to return to the menu editor.
View Your Mega Menu on the Frontend
To see your mega menu in action, navigate to the frontend of your website.
Hover over the menu item where you enabled the mega menu (for example, the “About” item). You’ll see the custom content you created in Elementor displayed as a dropdown.
The mega menu will display all the widgets, styling, and layout you configured in the Elementor editor.
That’s it! You can now create beautiful, custom mega menus for your Sydney Pro website using Elementor’s powerful design capabilities.
Next, would you like to explore more design options? Check out our guide on Sydney Studio to learn how to import pre-designed sections, headers, and footers into Elementor.
