[Pro] Offcanvas Content Module
Would you like to display additional content on your website that only appears when a visitor clicks a specific button or link? The Offcanvas Content module in Sydney Pro lets you add content outside of the visible screen area and reveal it with a single click using a custom trigger.
This guide will walk you through activating, configuring, and using the Offcanvas Content module.
This feature is only available in Sydney Pro. To learn more about Sydney Pro, please go here.
Activating the Offcanvas Content Module
Before you can use the Offcanvas Content feature, you need to activate the module in the Theme Dashboard.
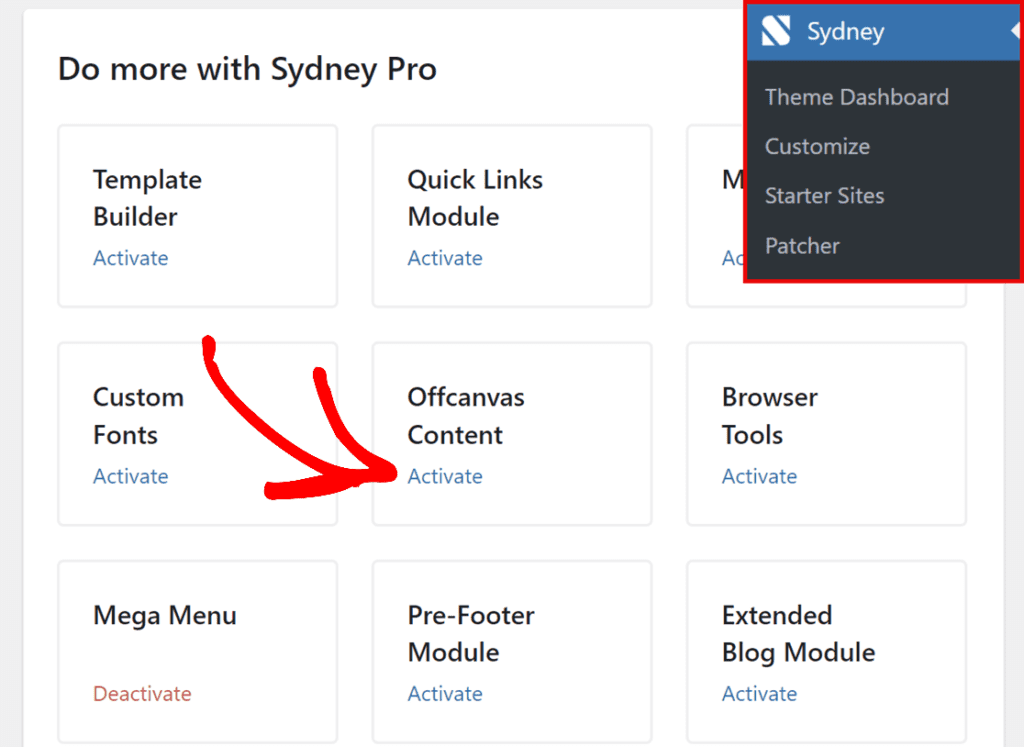
To do so, go to your WordPress admin area and navigate to Sydney > Theme Dashboard.
Once you’re on the Theme Dashboard page, locate the Offcanvas Content module under the Do more with Syndey Pro section, and click the Activate button.
Configure the Offcanvas Content
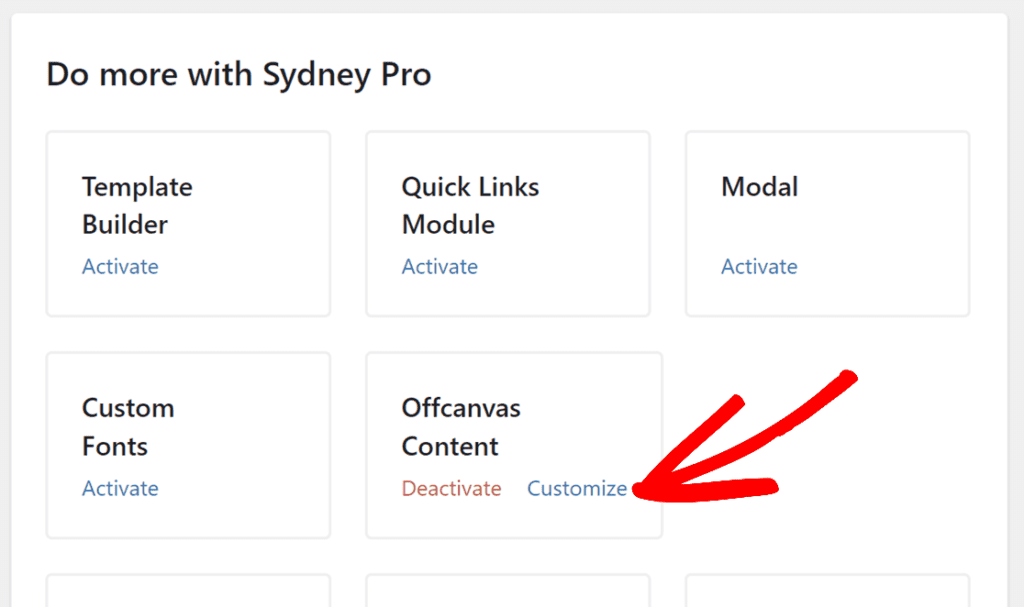
Once you’ve activated the Offcanvas Content, click the Customize button to open its settings page.
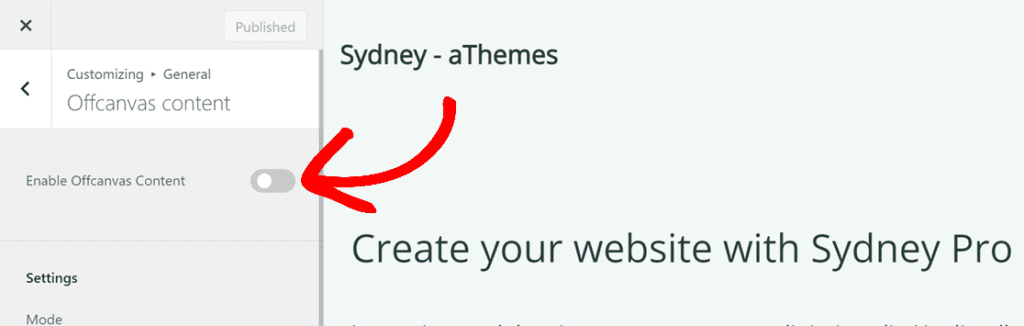
This will open a new page with this module settings in Customizer.
Here, toggle the Enable Offcanvas Content option to turn on the offcanvas content feature.
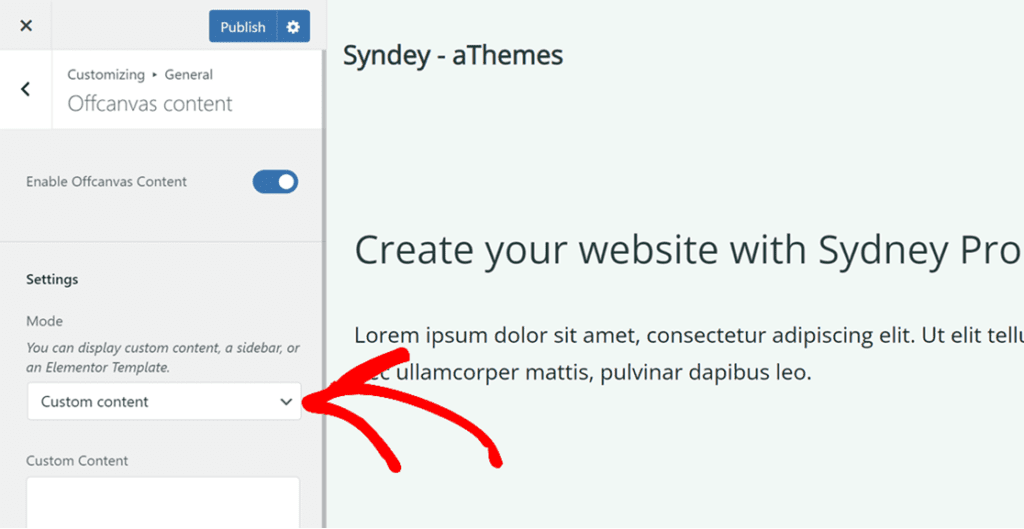
Once enabled, you can configure the following settings:
Content Type Options
Select the type of content you want to display in the offcanvas panel. There are three content type options:
- Custom Content: choose this to add your own HTML or regular text. This is useful for displaying simple messages, contact information, promotional text, or any custom HTML code.
- Sidebar: choose this to display one of your existing WordPress sidebars inside the offcanvas panel. After selecting this option, pick the sidebar you want to display from the dropdown list.
- Elementor Template: select this to display a pre-built Elementor template inside the offcanvas panel. This option gives you full design control over the offcanvas content.
Using the Elementor Template
To use an Elementor template:
- First, go to your WordPress admin area and navigate to Templates > Saved Templates in the Elementor menu.
- Click Add New and create a new template.
- Design your template content in the Elementor editor (for example, add headings, text, images, contact information, or any other widgets).
- Click Publish to save the template.
- Go back to the Customizer (Customize > General > Offcanvas Content).
- Select Elementor Template as the content type.
- Choose your newly created template from the dropdown list.
Note: If you just created a new Elementor template and it does not appear in the list, publish your Customizer changes and refresh the page. The new template will then be available in the dropdown.
Position, Trigger, and Display Conditions
Position
Select where the offcanvas panel slides in from. The available positions are:
- Right (default)
- Left
- Top
- Bottom
Custom Trigger
The offcanvas content is opened when a visitor clicks on an element that contains a specific CSS class. By default, this class is `.sydney-offcanvas-trigger`.
You can change the trigger to any custom CSS class that suits your needs. Simply enter the class name in the Custom Trigger field (include the dot at the beginning for a class selector).
Display Conditions
If you do not need the offcanvas content to appear on every page of your website, use the Display Conditions option to control where it shows. Click the display conditions field and select the specific pages, posts, or areas where you want the offcanvas content to be available.
Styling Options
The Offcanvas Content module includes a set of styling options to help you match the panel design to your website. The available styling options include:
- Width — Control the width of the offcanvas panel.
- Padding — Adjust the inner padding of the offcanvas content area.
- Color options — Customize various color settings for the panel to match your site design.
Adding the Trigger to a Menu Item
One common use case is adding the offcanvas trigger to a navigation menu item, so clicking that item opens the offcanvas panel instead of navigating to a page.
To add the trigger class to a menu item:
- Go to Appearance > Menus in your WordPress admin area.
- At the top of the page, click Screen Options and enable the CSS Classes checkbox.
- Click on the menu item you want to use as the trigger (for example, an “About” or “Contact” item).
- In the CSS Classes field, enter `
sydney-offcanvas-trigger` (without the dot). - Click Save Menu.
When you visit the frontend and click on that menu item, the offcanvas panel will slide in and display your configured content.
That’s it! You can now add offcanvas content to your Sydney Pro website and trigger it from any button, link, or menu item.
Next, would you like to explore other ways to display dynamic content? Check out our guide on the Modal Popup feature to learn how to show timed popup content to your visitors.